
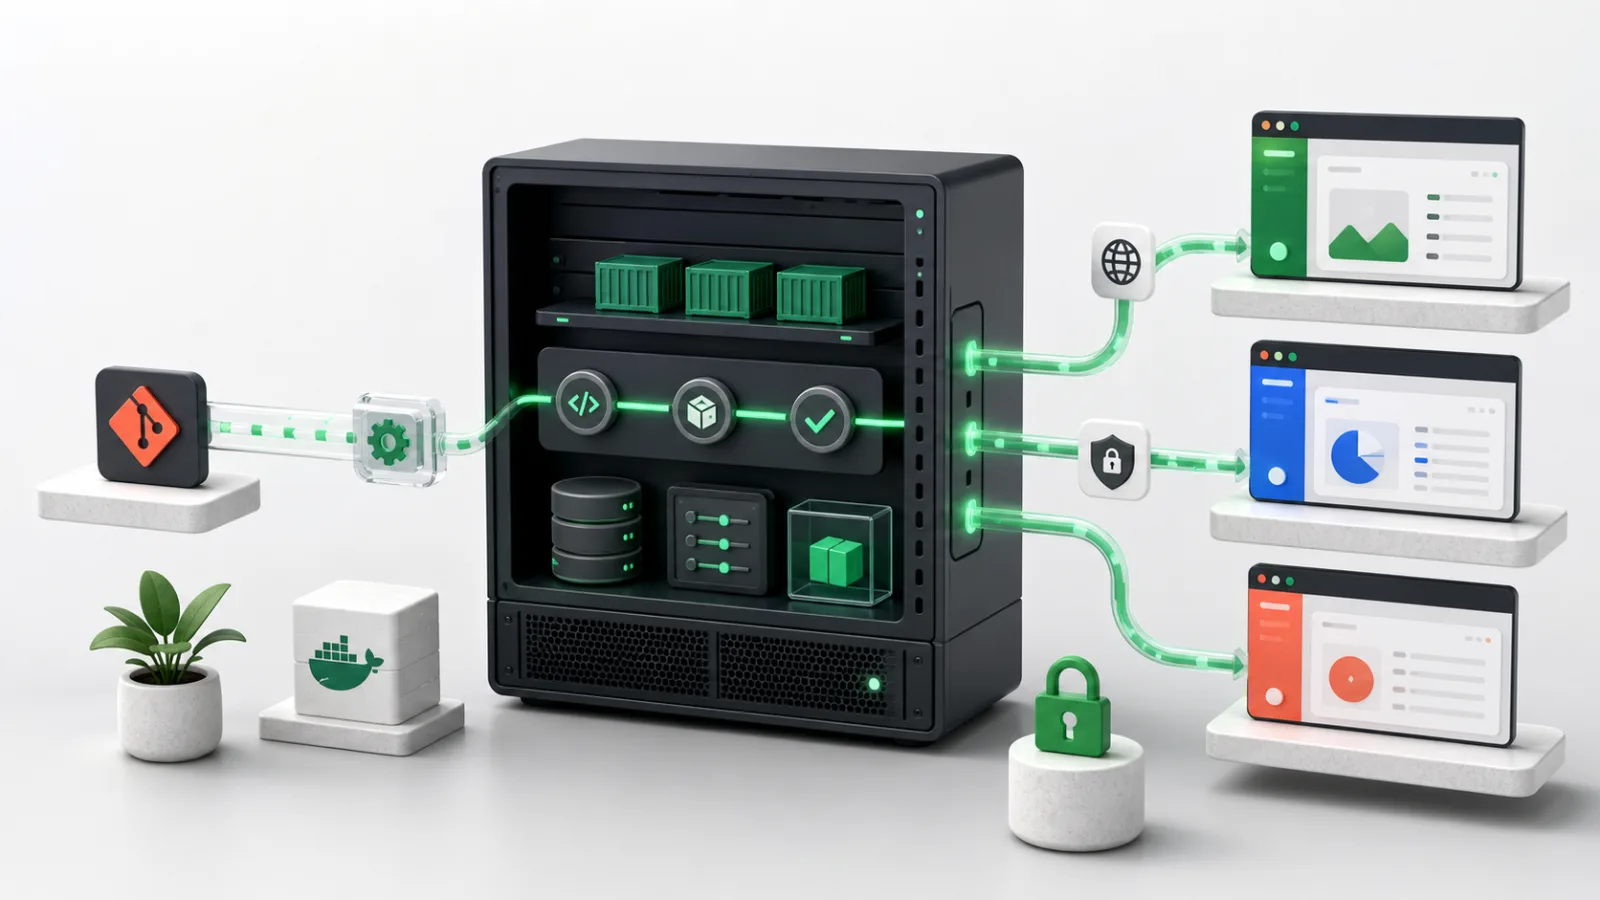
Deploy Coolify on VPS infrastructure when you want a self-hosted platform for building and operating applications, databases, and services on a server you control. The VoyraCloud application image removes the initial Coolify installation work, while you remain responsible for the projects, credentials, domains, data, updates, backups, security, and capacity of the VPS.
TL;DR
- The VoyraCloud Coolify image provides Coolify on Ubuntu 24.04 LTS for eligible Cloud VPS and Residential IP VPS configurations.
- Create the first Coolify administrator through the SSH Tunnel shown in the VPS resource details. Do not expose an uninitialized registration page to the public internet.
- The initial local dashboard address is
http://127.0.0.1:8000while the SSH Tunnel is open. It is not a public URL. - Ports
80and443are used by the Coolify proxy for deployed applications, domain validation, and HTTPS. Management ports8000,6001, and6002stay off the public internet. - Point your own domain to the VPS and enter an
https://FQDN in Coolify to let its proxy request and renew a Let’s Encrypt certificate. - Coolify can deploy from Git repositories, Dockerfiles, Docker Compose, and prebuilt container images, but builds and databases consume the same VPS resources unless you move them elsewhere.
- Back up both the Coolify instance and every application’s own database, persistent volume, files, and secrets. A Coolify database backup alone is not a complete application backup.
- VoyraCloud does not automatically upgrade your Coolify instance after delivery. Review releases, back up first, and upgrade deliberately.
What Is Coolify?
Coolify is an open-source, self-hosted deployment platform for running applications, databases, and Docker-compatible services on servers you control. It provides a web dashboard for connecting source repositories, building applications, managing environment variables, viewing logs, assigning domains, operating databases, and controlling deployments.
Coolify describes itself as a self-hostable alternative to platforms such as Heroku, Netlify, and Vercel. The important difference is operational ownership: Coolify runs on your infrastructure, and your workloads remain on servers you administer. The platform adds deployment automation, but it does not turn a self-managed VPS into a managed hosting service.
The official Coolify introduction lists Git-based deployment, Docker-compatible services, custom domains, automatic certificate handling, backups to S3-compatible storage, webhooks, an API, monitoring, and a browser terminal among its capabilities.
Coolify is a good fit when you want to:
- Deploy websites, APIs, workers, and full-stack applications from Git.
- Run Docker images or Docker Compose projects through one interface.
- Operate development, staging, or small production workloads on your own server.
- Manage domains, environment variables, deployment logs, and health checks centrally.
- Host databases and services alongside applications when the VPS has enough capacity.
It is less suitable when nobody can own Linux administration, application security, database recovery, or incident response. A friendly dashboard reduces repetitive work; it does not remove the need for an operator.
What Does the VoyraCloud Coolify Image Include?
The application image includes a tested Coolify starting environment, not a prebuilt business application or a managed platform. It lets you begin at Coolify’s first-administrator flow instead of installing the operating system dependencies and Coolify manually.
| Included with the image | User-managed or not included |
|---|---|
| Ubuntu 24.04 LTS | Your application code and architecture |
| Fixed Coolify release tested at resource creation | Automatic Coolify upgrades after delivery |
| Docker-based Coolify services and integrated proxy | A deployed website, API, database, or one-click service |
| Persistent Coolify configuration on the VPS disk | Automatic off-server disaster recovery |
| Service recovery after a normal VPS restart | High availability or automatic failover |
| SSH Tunnel instructions for first access | A precreated Coolify administrator |
| Public ports 80 and 443 for applications and HTTPS | A domain name or DNS management |
| Local-only management ports | Public exposure of the registration page |
| Full VPS administration access | Managed Linux, database, or application operations |
The resource page records the Coolify version delivered when the VPS is created. If you later upgrade Coolify yourself, that displayed value does not become a live software inventory.
For a lower-level container environment without a deployment platform, compare this model with the Docker on VPS with Portainer guide. Docker and Portainer expose container primitives directly, while Coolify adds application-oriented build, domain, deployment, and service workflows.
How Do You Deploy Coolify on VPS from the Application Image?
Start by creating an eligible VoyraCloud VPS, opening its Application details, and using the provided SSH Tunnel before you create the first administrator. The tunnel is essential because the initial registration page can grant control over the Coolify instance and the server it manages.
1. Create a VPS with the Coolify Image
Open the VoyraCloud Coolify page, continue to the purchase flow, and select an eligible Cloud VPS or Residential IP VPS configuration. Choose any region currently offered by the selected product and confirm that Coolify is selected in the Images section.
VoyraCloud Cloud VPS is the general-purpose choice for application hosting, builds, APIs, databases, and developer tools. Residential IP VPS is also supported when a legitimate workload specifically needs that product’s network characteristics, but a residential IP does not make Coolify itself faster, safer, or easier to operate.
Coolify’s official installation guide states a baseline of two CPU cores, 2 GB RAM, and 30 GB free storage. That is a starting floor for the platform, not a capacity promise for the applications you deploy. Builds, databases, logs, container images, and persistent data all use additional resources.
2. Copy the SSH Tunnel Command
Wait until the VPS is ready, then copy the complete SSH Tunnel command from the Application section of the resource page. It uses the actual SSH username, SSH port, and public address of your VPS.
The command follows this structure:
ssh -p {ssh_port} \
  -L 8000:127.0.0.1:8000 \
  -L 6001:127.0.0.1:6001 \
  -L 6002:127.0.0.1:6002 \
  {ssh_user}@{server_ip}
Keep the SSH session open. The three forwards support the dashboard, real-time communication, and browser terminal. Closing the SSH session closes the tunnel but does not stop Coolify on the VPS.
If one of those local ports is already in use on your computer, change only the number on the left side of that mapping. For example, -L 18000:127.0.0.1:8000 uses local port 18000 while still reaching Coolify on server port 8000. Use the corresponding local URL in your browser.
3. Create the First Administrator
Open http://127.0.0.1:8000 while the tunnel is connected and create the first Coolify administrator immediately. Use a unique email address and a strong password that is not reused elsewhere.
The address is local to your computer and works only through the authenticated SSH connection. Do not replace it with http://{server_ip}:8000 or open management ports to the internet as a shortcut. Coolify’s official installation guide warns that another person who reaches an uninitialized registration page first may gain full control of the server.
After registration:
- Sign in with the new administrator.
- Confirm that the localhost server appears reachable.
- Review the update settings and keep automatic upgrades disabled for controlled production operation.
- Check disk and memory usage before deploying an application.
- Keep the SSH Tunnel as the management path until you configure a trusted domain.
4. Deploy a Small First Application
Use a small public repository or a prebuilt container image for the first deployment so you can validate the complete path before adding a database or private credentials. Coolify supports public and private Git repositories, Dockerfiles, Docker Compose, prebuilt Docker images, and build packs.
A controlled first test should verify:
- Coolify can reach the selected source.
- The build finishes without exhausting CPU, memory, or disk.
- The application container becomes healthy.
- Logs are visible and contain no recurring startup errors.
- The application responds through its assigned domain.
- A VPS restart does not remove its configuration or persistent data.
The official Coolify examples repository contains small application examples suitable for learning. Review the example before deployment, because public code is still third-party input running on your server.
How Do Domains and HTTPS Work in Coolify?
Coolify can configure its proxy and request a Let’s Encrypt certificate after your domain resolves to the VPS and you enter an https:// FQDN. VoyraCloud does not include the domain or control its DNS records.
For the Coolify dashboard or a deployed application:
- Create an A record that points the chosen hostname to the VPS IPv4 address.
- Wait until public DNS returns the expected address.
- Enter the full hostname in Coolify using the
https://scheme. - Keep public TCP ports
80and443reachable so the proxy can serve traffic and complete certificate validation. - Wait for certificate issuance, then open the final HTTPS URL.
- Confirm that plain HTTP redirects to HTTPS and that the browser shows no certificate warning.
- Test renewal behavior before the certificate becomes critical to a production service.
The official Coolify domains guide explains that entering an HTTPS FQDN causes the integrated Traefik or Caddy proxy to generate routing configuration, request a Let’s Encrypt certificate, and handle renewal. If issuance fails, Coolify may serve a self-signed certificate, which keeps the endpoint reachable but still causes a browser warning. Treat that warning as a failed trusted-HTTPS setup and fix DNS, reachability, rate limits, or proxy configuration.
After a trusted dashboard domain works, you can continue using the SSH Tunnel or use the HTTPS domain according to your access policy. Do not publish ports 8000, 6001, or 6002 simply because the dashboard has an administrator password. Coolify’s firewall guidance allows those ports to be closed when a custom domain and integrated proxy are in use.
Which Deployment Method Should You Choose?
Choose the simplest deployment method that matches how your application is built and maintained. Every extra build layer or public service increases resource use and operational work.
| Deployment method | Best fit | Main responsibility |
|---|---|---|
| Build pack | Common frameworks with conventional project structure | Verify detected build and start commands |
| Dockerfile | Applications needing a controlled, reproducible image build | Maintain the Dockerfile and base images |
| Docker Compose | Multi-container applications and existing Compose projects | Review networks, volumes, ports, and service dependencies |
| Prebuilt Docker image | Software already published to a trusted registry | Pin an image version and verify its source |
| One-click service | Supported self-hosted tools with a Coolify template | Review generated variables, storage, and upstream image versions |
Coolify runs applications as Docker containers. Building source on the same VPS can create CPU, memory, and disk spikes, especially for large JavaScript dependencies, native compilation, or multi-stage Docker builds. If builds make the server unresponsive, increase the VPS size or use a separate build server instead of assuming the dashboard can isolate unlimited work.
Pin application and database image versions where practical. A floating tag can pull a materially different release during a routine redeploy, creating an upgrade you did not plan.
How Should You Size a Coolify VPS?
Size the VPS for Coolify plus the peak resource use of every build, application, database, log stream, backup, and container image stored on the server. The purchase-flow minimum is an eligibility threshold for a small starting workload, not a universal recommendation.
| Workload pattern | Main pressure | Planning guidance |
|---|---|---|
| One small static site | Build CPU and image storage | Keep headroom for rebuilds and updates |
| API without a local database | Memory and traffic bursts | Monitor process memory and restart behavior |
| Web app plus database | RAM, disk latency, and backup space | Protect database data with persistent storage and native dumps |
| Several applications | Aggregate memory, logs, and images | Measure combined peaks, not idle usage |
| Large source builds | CPU, RAM, temporary files, and image layers | Consider a larger plan or separate build server |
| Stateful services | Disk durability, growth, and recovery | Plan retention, off-server backup, and restore tests |
Watch free disk space as closely as memory. Docker image layers, build caches, deployment history, logs, database files, and backups can grow until deployments fail or databases stop. Cleanup should remove only artifacts you understand; deleting an active volume is not routine maintenance.
If a workload is business-critical, a larger single VPS improves capacity but does not provide high availability. External backups, monitoring, failover, and a multi-server design are separate requirements. A self-hosted Uptime Kuma deployment can provide one monitoring viewpoint, but it should not share every failure domain with the service it monitors.
What Must You Back Up?
Back up the Coolify control-plane data and each deployed workload’s own state as separate recovery layers. The official Coolify backup process protects Coolify settings, but it does not automatically include every application volume or database.
A complete recovery plan should cover:
- The Coolify database backup.
- The Coolify
APP_KEY, stored securely outside the VPS. - Coolify-managed SSH keys needed to reconnect managed servers.
- Database-native dumps for PostgreSQL, MySQL, MariaDB, MongoDB, or other stateful services.
- Persistent volumes and bind-mounted application files.
- Git repositories, Dockerfiles, Compose files, and deployment documentation.
- Environment variables and secrets through a secure, recoverable process.
- DNS records, domain ownership, proxy assumptions, and certificate dependencies.
- A tested restore order on another server.
Do not store the only backup on the same VPS. A disk failure, account compromise, accidental deletion, or VPS deletion can remove both the live workload and a local copy.
The official Coolify backup and restore guide explicitly notes that a Coolify instance backup does not back up application data such as volume mounts. Test restoration with the same Coolify version used to create the backup, then verify projects, credentials, applications, databases, and domains before calling the recovery successful.
How Should You Update Coolify and Deployed Applications?
Update Coolify and your applications deliberately, with a verified backup and a rollback plan for each stateful layer. The VoyraCloud image delivers a fixed Coolify version and does not continuously update your instance.
Before a Coolify upgrade:
- Read the official release notes and breaking changes.
- Record the currently running version.
- Back up the Coolify database,
APP_KEY, SSH keys, applications, databases, and volumes. - Confirm enough free disk space for new images and migration work.
- Schedule a maintenance window.
- Upgrade to a specific reviewed version rather than an unreviewed floating target.
- Test login, server reachability, one build, one deployment, logs, terminal, domains, HTTPS, and restart recovery.
- Restore on a separate system when you need to prove rollback rather than assuming an older container image is sufficient.
Coolify supports automatic, semi-automatic, and manual upgrades. For a production instance, controlled manual or reviewed semi-automatic upgrades reduce surprise. The official upgrade guide also recommends backing up before an upgrade.
Application updates are separate. A Coolify upgrade does not update every application safely, and a new application image may include database migrations that make rollback harder. Pin versions, review upstream changes, back up data, deploy, test, and monitor each workload according to its own requirements.
Common Mistakes to Avoid
The most serious Coolify mistakes involve public management exposure, incomplete backups, and treating a deployment platform as unlimited infrastructure. Avoid these patterns:
- Do not expose an uninitialized Coolify registration page to the public internet.
- Do not open ports
8000,6001, or6002as a shortcut around the SSH Tunnel or domain setup. - Do not assume UFW alone blocks Docker-published ports; verify reachability from an external network.
- Do not place databases on public ports unless remote access is required and secured.
- Do not commit environment secrets to Git or paste them into public build logs.
- Do not use floating container tags for important stateful services.
- Do not assume a successful container start means an application is healthy.
- Do not treat the minimum eligible VPS as enough for arbitrary builds or multiple databases.
- Do not keep the only backup on the same VPS.
- Do not confuse a Coolify database backup with application-volume or database backups.
- Do not enable unattended upgrades without understanding migrations and rollback.
- Do not expect one VPS to provide high availability.
FAQ
What does it mean to self-host Coolify on a VPS?
It means running the Coolify deployment platform on a virtual Linux server you control. Coolify manages builds, containers, domains, services, and deployment workflows, while you manage the VPS, applications, data, credentials, updates, security, backups, and capacity.
Do I need to install Coolify manually?
No, the VoyraCloud application image delivers Coolify preinstalled. Create an eligible VPS, copy the SSH Tunnel command from the resource page, open the local dashboard URL, and create the first administrator. You still deploy and configure your own applications.
Why is the Coolify dashboard not available at the public server IP?
The initial dashboard is intentionally accessed through an SSH Tunnel because the first registration grants high-privilege control. Keep the provided tunnel open and visit http://127.0.0.1:8000. Later, you can configure your own dashboard domain and trusted HTTPS through Coolify’s proxy.
Which ports does Coolify need?
Public ports 80 and 443 support application traffic, domain validation, and HTTPS, while management ports 8000, 6001, and 6002 remain local in the VoyraCloud image. SSH uses the port shown for your own VPS. Additional ports depend on applications you deliberately publish.
Does Coolify automatically provide HTTPS?
Coolify can automatically configure its proxy and request a Let’s Encrypt certificate after you point a domain to the VPS and enter an HTTPS FQDN. A domain is not included, DNS must resolve correctly, and public ports 80 and 443 must be reachable. A self-signed fallback is not browser-trusted HTTPS.
Can I deploy private Git repositories?
Yes, Coolify supports private repository workflows through supported Git integrations and deploy keys. Use least-privilege credentials, review webhook exposure, rotate keys when access changes, and never store repository credentials in public logs or code.
Does Coolify back up every deployed application?
No, a Coolify instance backup does not automatically protect every application database, volume, or file. Back up the Coolify control plane, application databases, persistent storage, configuration, secrets, and recovery documentation separately, then test the complete restore.
Is the minimum eligible VPS enough for multiple applications?
Not necessarily. The minimum supports the Coolify platform and a light starting workload, while real capacity depends on build size, application memory, databases, logs, traffic, backups, and storage growth. Monitor actual usage and move to a larger configuration before resource pressure affects reliability.
Does VoyraCloud update Coolify for me?
No, Coolify is self-managed after the VPS is delivered. Keep automatic updates controlled, review upstream release notes, back up all required data, and upgrade to a specific tested version. Operating-system and application updates remain separate responsibilities.
Can Coolify make one VPS highly available?
No, one Coolify VPS remains one failure domain. A larger server can provide more capacity, but high availability requires separate servers, load balancing, replicated state where appropriate, independent monitoring, external backups, and tested failover.
Conclusion
Self-host Coolify on a VPS when you want application-oriented deployment automation without giving up control of the underlying server. The VoyraCloud application image gives you a tested starting environment and a private first-access path, while Coolify provides Git, Docker, domain, HTTPS, database, and service workflows.
Begin with the SSH Tunnel, create the first administrator, deploy one small application, and validate a real domain with trusted HTTPS. Then add workloads gradually, measure resource use, pin versions, protect secrets, back up every stateful layer, and test recovery before the server becomes critical.
For a lower-level container management workflow, compare this approach with running Docker and Portainer on a VPS.
Explore the VoyraCloud Coolify application image to start from the preinstalled environment.